Final Fantasy 6 Walkthrough with Dagger

ESPER SPOTLIGHT: GILGAMESH
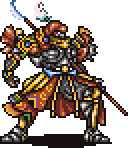
Gilgamesh1.gif


Gilgamesh's Summon Attacks (50 MP)
Gilgamesh's summon will do 1 of 4 different attacks. Each has a different sword glow and a different effect. Here are each of them. The summon always costs 50 MP.


Masamune: Yellow Sword Glow - Does lots of non-elemental physical damage to all enemies

Excalibur: Red Sword Glow - Does holy elemental magic damage to all enemies

Excalipoor: Light Blue Glow - Does 1 point of damage to all enemies

Enkidu: All Three Swords Glow - Gilgamesh and his friend Enkidu a big green monster (his sidekick from FF5) show up and attack all enemies for massive magic damage


Spells taught:
Quick x1
Valor x5

Gilgamesh uses a modified version of his un-morphed FF5 sprite. He teaches Valor, which is a new spell. It augments the whole party to where their next physical attack will do extra damage. Valor's worth checking out. There is no other spell like it. He'll also teach Quick so Raiden is no longer the only option, even though it's still at an x1 modifer. Gilgamesh has arguably the coolest summon in the game, if you are willing to take the risk of it randomly generating the Excalipoor attack. The chances of you getting that attack are small, while the other three are powerful. Enkidu in particular is VERY powerful. Absolutely worth checking out. The best of the new espers.​
 
DEATH GAZE
My Party: Terra, Celes, Sabin, Gogo

terra.gif
celece.gif
sabin.gif
gogo.gif


Death Gaze, also known as Doom Gaze in older versions, is encountered while flying around on the world map. This should be among the last events you attempt, as it consists of battling a difficult boss. He has high physical resistance so you'll want to rely on casters. Sabin's Bum Rush also works well, so I brought him. Fly around on the world map for a while and at some point you will enter a random encounter, this boss music plays and your enemy is Death Gaze. In order to best prepare for this fight, first of all make sure that NO ONE is on a level that is a multiple of 5 because the boss will use L5 Death which will instantly defeat anyone who is on a level that is a multiple of 5. Make sure you bring casters who can heal and cast Fire 3. If you bring Relm, make sure she has the Memento Ring.


HARD MODE NOTE:

Available, but as should be expected, it will be a lot tougher. You don't have Fire 3 or Cure 3, so you'll want to be on a really high level.
 
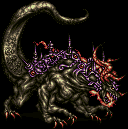
BOSS BATTLE: Death Gaze

Image811.gif


The boss knows L5 Death, as I already warned you earlier. Have Terra Morph then cast Fire 3. If you have any Fire Rods left, use them. Death Gaze has a weakness to fire. Celes should be doing this as well if she's not healing. Relm can follow a similar strategy. Strago or Gogo should cast Mighty Guard if they are in the party immediately, they can also help with the healing with the Pearl Wind Lore. Sabin's Bum Rush is really effective here, so you may want to give Gogo Blitz then have them both using Bum Rush. Edgar or Mog can Jump with the Dragon Horn equipped. Cyan should use Quadra Slice while Gau should use Stray Cat. Locke should attack with his Snipers from the back row while equipped with the Offering and Genji Glove. Or with the Atma Weapon and Valiant Knife. Setzer should attack with his dice or help with the casting. Shadow should Throw Shurikens like usual. Umaro won't be much of a help here as his only magical attack is ice elemental and the boss has a high physical resistance. Your fighters as a whole really won't be of as much use here, this is a battle where the casters shine.

An important note is that the boss can also Escape. If he does, heal up, save, and try to battle him again following the same strategy. Eventually you will defeat him. He does not regain any lost Health Points in between fights. The easiest way to win honestly, is to just buy a bunch of Pearl Rods from Thamasa. Use one each round until you win. If you want a challenge though, let's try to win without that tactic.

Your prize after winning is the Bahamut esper!


HARD MODE:

Much tougher. There's a couple of routes you can take. The first sees Edgar Jumping while equipped with the Dragon Horn and his best spear, Celes healing constantly, and Setzer helping Celes as needed or attacking with his dice. The second is everyone alternating between Fire 3 and Cure 2 depending on if you need to attack or heal on that particular character's turn. Level up if necessary. The alternative method also works too if you want an easier way out, buy a bunch of Pearl Rods from Thamasa and use them as items on Death Gaze. I took him out in 6 turns this way.

 
ESPER SPOTLIGHT: BAHAMUT

Bahamut%20-%20Summon.gif


Summon: Mega Flare / Sun Flare (86)
Does tons of non-elemental magic damage to enemies

Spells Taught:
Flare x2

Level up bonus while equipped: HP + 50%

Bahamut is an awesome esper. His summon is powerful, he grants a tremendous Health Points boost upon leveling up with him equipped, and he teaches Flare! While Flare isn't the best spell in the game, it's a cool spell you may want. This is ultimately an esper you won't want to miss out on. More than anything due to that Health Point boost. Plus.... it's Bahamut! What Final Fantasy fan doesn't like Bahamut!?
 
DOMA CASTLE
My Party: Mog, Terra, Gogo, Cyan

mog.gif
terra.gif
gogo.gif
cyan.gif


Time for my absolute lease favorite event. Cyan's Dream. I hate the puzzles in it and I hate the bosses in it. Well, we've put it off long enough. Let's go. Fly to Doma Castle which is just to the right of Nikeah. Make sure to bring both Terra and Mog. The reason Terra should come is because she has Magitek abilities no one else ever gets, and this event contains the final time you get to use Magitek Armor. The reason Mog should come is so he can use the Moogle Charm Relic to prevent the highly annoying random encounters. Trust me, in this event you don't want them. They are ten times as annoying here. I brought Gogo just because.

At Doma go to Cyan's bedroom and the chest in there has an X-Potion. Go through the door south of Cyan's bedroom. Follow the outdoor path to a door that leads to a treasure room. The chests have a Phoenix Down and Beads. Head back to the main hall and enter the lower left door. Go inside the room on the far left. The clock in here has an Elixir despite having a different sprite than most other "Elixir clocks". You can also find an Ether in a chest next to the clock and the beds on the right side of that room. Exit and go through the door on your right, rest in the beds to trigger Cyan's dream.


CYAN CANNOT CONFRONT HIS DREAM ALONE!

You have to bring a full party here. Cyan by himself will not trigger this event. Neither will bringing only 1 or 2 allies with Cyan. It must be a full party of 4. It is due to needing to have two different allies to re-join your initial ally during the part with the Dream Stooges maze.


DO NOT START THIS EVENT IF YOU ARE NOT READY! YOU ARE STUCK ONCE YOU BEGIN IT AND CANNOT LEAVE UNTIL IT IS COMPLETED!


HARD MODE NOTE:

This is not available due to it requiring Cyan.
 
CYAN'S DREAM - DREAM STOOGES MAZE
My Party: Mog, Terra, Gogo

mog.gif
terra.gif
gogo.gif


Your party minus Cyan will enter Cyan's mind to chase after three Dream Stooges monsters who tried to take over Cyan's mind.

You begin as one of your characters inside a maze that has an eternally ongoing rainstorm. Despite the cool looking background, it's no fun. If you do not start off with Mog and you get into random encounters, go ahead and run. I won't hold it against you. They are super annoying when you are trying to concentrate on puzzles. In this place I care more about getting to the boss fight so I can exit the event more than anything. Go to your left approaching the three doors next to each other. Take the left one first. You'll find one of your allies here and one of the Dream Stooges. The monster runs away and your ally rejoins you. Go through the north door. Now there's a north and a south door, take the northern one. There's a door to the left and right of you here, take the one on the right to find your other ally with another Dream Stooges monster. The Dream Stooges monster runs away and your ally rejoins you. Now the party should be full again minus Cyan. Go through the door to your left, then head left in that room and enter the door in the center of the big part of the platform.

The boss battle is in this room. Walk down to the door but do not go inside yet. If you are still missing an ally, the game will not let you proceed through the door. So no being mean and trying to leave someone behind, as you cannot. Anyway, heal up to maximum Health Points and remove the Moogle Charm from Mog for the fight if you have him. Give him the Dragoon Boots and Dragon Horn. Step over to the door and try to enter. The three Dream Stooge monsters will now attack you, and it's the first of the two boss battles in this event!


WHY IS GOGO PURPLE?

This has happened more than once during this event, and it happened again while writing this. If I bring Gogo, he/she is purple while being unconscious on the field screen by the Dream Stooges monster. Gogo then returns to his/her normal color scheme upon re-joining. That purple/pink/magenta color scheme on Gogo looks very weird.


HARD MODE NOTE:

This is not available due to it requiring Cyan.
 
BOSS BATTLE: Larry, Curly, Moe

These guys are pretty tough. Depending on when you attempt this event the battle ranges from medium to difficult. If you haven't learned Fire 3 and Ice 3 by now, you'll wish you had. It won't be impossible but you may struggle without magic from advanced espers like Starlet, Phoenix, or Tritoch. Curly (the one at the top of the battlefield) will revive Larry and Moe if he is the last remaining, so you will want to defeat him first. He is weak against Ice so have your casters cast Ice 3 on him! Larry is weak against fire so cast Fire 3 on him and target him second so he does not run away, he might if he is the last remaining. Moe doesn't have a weakness. If all three are alive they can use a Delta Attack that petrifies a party member. Be ready to heal with Remedy item if this happens. Melee skills work fairly well on them too so you do not have to rely fully on casting for your offensive tactics. Unleash your strongest abilities whether that be casting Fire/Ice magic on the monsters to exploit their elemental weaknesses, or relying on special abilities like Sabin's Blitzes. Mog's Jump with the Dragon Horn equipped proved as effective as always.
 
CYAN'S DREAM (TRAINS AND MAGITEK ARMOR)
My Party: Mog, Terra, Gogo

mog.gif
terra.gif
gogo.gif


I hate this part so much. Highly frustrating. Make sure Mog has the Moogle Charm here. You're in an area that looks just like the Phantom Train. There's no music just the sound of the train on the tracks. The first portion is straightforward just work your way to the left. Through the train car to your left. You'll see Cyan running from a Ghost into one of the train cars. Follow Cyan and the Ghost inside. They'll be gone by the time you enter. Ok so in here you see a switch north of you, go flip that. It moves the crate to the left of the chest that's next to you. It has a Genji Glove in it. Keep moving left and you see a chest in between two booths but the empty chest in front of you keeps blocking you and moving in your way if you approach the closed chest. Go to the far left and open that chest to get a Lump of Metal. This actually serves a purpose. Put it into the chest that was blocking you from reaching the closed chest in between the booths, do this by pressing A. Now go open the chest in between the booths to get a Flame Shield. The diary on the table by the chest where the Lump of Metal was gives you a hint to memorize positions, this refers to the 6 chests on the floor. Flip the switch and some will open while others will not. The chests are as follows.... Top row are open, open, closed. Bottom row are closed, closed, open. Exit the room.

Head left and enter the next train car through the door. Oh, this room sucks. Ok so there are three switches in this puzzle. Flip the right switch first to open the booth. Flip the left switch to move the crates south. Flip the riight switch to close the booth. Flip the middle switch to move the booth below you. Flip the right switch to open the booth again. Flip the left switch to move the crates up. Go over to the chest in the bottom right corner below the right switch and open it to get an X-Potion. Walk below the crates and to your left. There's another chest with an Ice Shield below the left switch. Now you will see 6 chests in a formation similar to the last room on the floor. In order to flip the switch above these chests they must be opened/closed in a formation matching those in the last room. So with all 6 currently being open you need to close the chests on the upper row on the right, the lower row on the left, and the lower row in the middle. Now flip the switch. You can leave this room now. Keep going left once outside and you'll find the engine. Go inside. Flip the switch on the left then exit the room to finally be done with this stupid train part!

Now you're in a cave wearing Magitek Armor. Cyan is looking around at some boxes then gets chased out by soldiers. Follow him south. This marks the third and final time in the game that you'll ever have Magitek Armor, by the way. Follow the path until it loops, you'll find yourself in the same outdoor area again. Now go back the way you came. Cyan crosses a bridge, follow him and the bridge breaks. You fall down and are back in Doma but still in Cyan's mind. His wife and son's spirits show up asking for you to help Cyan by defeating a monster named Wrexsoul. A save point appears. Use it if you want, however you'll be stuck here forever if you save but fail to defeat the upcoming boss. Outside you can view memories Cyan had of training and fishing with his son. In Cyan's bedroom is a memory with his family. The boss is in the throne room.


MAGITEK TRIVIA

Terra%20-%20M-Tek%20(Left).gif
Sabin%20-%20M-Tek%20(Left).gif
Cyan%20-%20M-Tek%20(Left).gif
Shadow%20-%20M-Tek%20(Left).gif


Terra is still the only one who can use Tek Missile, Bio Blast, etc. Gogo can Mimic them, but he/she cannot select them if Terra is in the party and you converted a Fight command into Magitek for Gogo. Umaro will randomly choose between Fire/Ice/Bolt Beams. Gau has a normal Magitek command. Everyone else all have the same Magitek options Sabin and Cyan did in the Imperial Camp long ago.
 
BOSS BATTLE: Wrexsoul, Soul Saver (2)

Image1062.gif
Image1006.gif


This is the hardest boss in the entire game, unless you know X-Zone. If you do know X-Zone then it can be ended in a matter of moments. Cast X-Zone to defeat the Soul Savers without triggering their auto-reviving programming. Wrexsoul is not on the screen if he possessed a party member, so if you manage to defeat the Soul Savers the game ends the battle thinking it's over. Wrexsoul, within the story, would simply just cease to exist at this point. This is because the Soul Savers only show up to keep the boss battle playing out when Wrexsoul possesses someone. They cannot be defeated other than with X-Zone due to them being programmed to auto-revive themselves when hit with any other attack. This may be something the original development team missed when testing stuff. Just cast X-Zone and save yourself the trouble of having to win this fight the way you're "supposed" to. Words cannot describe my dislike of this fight.

If you'd rather do it the hard way, it's an absolute nightmare. Wrexsoul possesses a party member, leaving you to guess which one it was. You must defeat your own party members one by one to get Wrexsoul to re-appear. If you're down to your last character and he's still not back, revive the other two and then defeat the last character. Heal up immediately and cast Ice 3 on Wrexsoul. Hurry because he will possess someone again. It's an AWFUL fight and I cannot stand it. You're best off relying on X-Zone, really. Unless you want the challenge. Cure 3, Ice 3, and either Life 1 (or Life 2 if you have it) are all a MUST in this battle if you don't have X-Zone.

Your prize for winning is the Alexander esper, and Cyan masters all of his remaining SwdTech abilities as well. You must go to the throne room upon returning to reality. The Alexander esper will be on the throne. Cyan's "ultimate" SwedTech skill is stupid and a waste of time. The 7th skill is his best, the Quadra Slice. Which you'll now have if you didn't already. If you did have it before this event, then Cyan "reaching his peak sword level" as the game calls it, does you no good. It comes automatically with completing this event though.
 
ESPER SPOTLIGHT: ALEXANDER

Alexandr1%20-%20Summon.gif


Summon: Divine Judgment / Justice (90 MP)
Does holy magical damage to all enemies

Spells taught:
Holy (Pearl) x2
Shell x10
Safe x10
Dispel x10
Remedy x15

Level up bonus while equipped: None

Alexander is the only esper to teach Holy. All of his other spells can be learned elsewhere but for the completionists you must master Holy through him. Alexander's summon is decent. As cool as Holy/Pearl is, it's hardly worth the painstakingly frustrating Cyan's Dream sidequest to get to it. If you're not a completionist, it's not truly worth it. Better spells and better summons exist.
 
GAU'S FATHER
My Party: Edgar, Sabin, Locke, Gau

Edgar%20-%20Battle.gif
Sabin%20-%20Battle.gif
Locke%20-%20Battle.gif
Gau%20-%20Battle.gif


This is a sidequest that provides closure for Gau by getting to meet his father. You need to bring Sabin and Gau to trigger the event in the first place, but you should bring Locke and Edgar because there are a couple of extra lines that do not get included unless they are both in the active party when the event triggers to start. Gau's father's house is north of Doma Castle. Walk inside and talk to him. He mistakes Sabin for a repairman yet again. The party regroups outside and decides to take Gau to Jidoor to help him prepare to meet his father. A comical scene follows where Sabin teaches Gau to eat politely and then the party goes shopping. Terra and Celes get upset when the shopkeeper disagrees with their ideas, Cyan finds a hat no one likes, Sabin picks a karate gi looking outfit, Setzer suggests an outfit like his own.

Then the extra portion of the scene that you needed Locke and Edgar for.... Locke will suggest an outfit just like his, Gau looks pretty cool in it honestly. This along with the karate gi Sabin suggested are the only two outfits Gau actually tries on. Edgar pokes fun at Locke and the two get into an argument. Now you're back at Gau's father's house and Gau is in a nice suit. Go inside and talk. A scene plays out and then the event is done after that. Gau will never be in the nice suit again (or the outfits Sabin and Locke suggested either, for that matter). You don't really get anything for doing this, it's fun to see play out though.


HARD MODE NOTE:

Not available due to needing Gau and Sabin.
 
HIDON
My Party: Terra, Locke, Strago, Relm

Terra%20-%20Battle.gif
Locke%20-%20Battle.gif
Strago%20-%20Battle.gif
Relm%20-%20Battle.gif


In order to do this event you need both Strago and Relm. I like to bring Terra and Locke since the event takes place in the Thamasa area and this was the Thamasa party in the first world. When you enter Thamasa if both Strago and Relm are in the active party they will be happy to be home up until they see their friend Gungho has been injured by Hidon, a monster that Strago and Gungho used to hunt. The cave known as Ebot's Rock will appear in the mountain on the island north of Thamasa. Fly there.

It is very dark in the cave. You will not be able to see more than a few steps around yourself. Step on the warp panel to be taken to a room with the most annoying NPC in the whole game, the talking treasure chest that likes to eat Coral. He will not move until you feed him 22+ pieces of Coral all at once. Step on the warp tile to be taken to a randomly generated room. Grab any Coral from the chests in the room, step on the warp tile and repeat until you know you have more than 22 pieces of Coral. If you end up back at the talking chest and have less than 22, step onto the warp tile and keep trying to find more. Do NOT talk to the talking chest until you have more than 22 pieces of Coral otherwise he eats all you have and you have to start over. Having Mog with the Moogle Charm may help if the random encounters begin to annoy you.

When you have given more than 22 pieces of Coral at once to the chest, he jumps offscreen. Now you can proceed. Hidon is waiting in the back corner of the room and the boss battle begins as soon as you approach him.


A GREEN CHUPON?
Chupon%20(Front).gif
Hidon%20(Front).gif


Hidon's sprite looks just like Chupon only green instead of yellow and pink. It's a coincidence, and nothing more than a palatte swap.


HARD MODE NOTE:

Unavilable due to needing Strago and Relm.
 
BOSS BATTLE: Hidon, Hidonite (4)

Image855.gif
Image856.gif


Even though they look identical, the four Hidonites are all different monsters. Melee attacks are best here since some of the Hidonites absorb elemental abilities. Defeat all of them first! Hidon will use Grand Train, Strago's ultimate Lore, when he is by himself. Then focus your attacks on Hidon himself before he has a chance to revive the Hidonites. Hidon likes to use Poison so have the Antidote spell ready if needed. Casters such as Terra, Relm, or Celes should cast Holy or Ultima if you have them. They can also focus on healing the party as needed. Strago should use Mighty Guard immediately, then assist the other casters. Melee abilties will work well here so have your Dragoons Jump. Shadow should Throw Ninja Stars. Make Gau use the Stray Cat Rage, Cyan should use Quadra Slice. Sabin's Bum Rush will also be effective. Have Gogo mimic your most powerful attacks. This fight won't be too bad if you are prepared. Make certain to allow Strago to be hit by Grand Train and survive! It is his ultimate ability! Hidon must be alone to make him use it, if you defeat Hidon first the Hidonites will all die when he does.

After the battle Strago will brag to Gungho, it is a little much, but he earned it having defeated the monster he had been out to defeat for nearly his whole life. Relm talks to Gungho outside afterwards and then the event ends.
 
BREAKING THE CURSE ON THE CURSED SHIELD
My Party: Celes, Terra, Relm, Locke

celece.gif
terra.gif
realm.gif
locke.gif


Remember the Cursed Shield? Yeah, so if you have the time to spare, you can break the curse. You must equip it onto a party member from the main cast (Gogo CANNOT uncurse it and Umaro can't equip shields anyway) then have that party member go through a grand total of 256 battles with the shield equipped. The curse of the shield inflicts a number of awful status effects on this party member such as Doom, Berserk, and Confusion. You will need to equip this character with the Ribbon Relic as they otherwise are a danger to themselves and the rest of your active party. The Ribbon will negate all of the negative statuses except Doom. You'll have to win the battles before the countdown reaches zero, the character must survive the battle to get a point towards uncursing it. The upside is, you do NOT have to keep it on the same character for all 256 battles. I had Terra, Celes, and Relm sharing the shield while I esper gained since they are my three primary casters.

There are two great methods to uncursing it. One is the fastest method and the other is the most effective method. The easiest is to pick any party that you like (provided someone other than Gogo or Umaro are also in it, to be equipped with the shield and a Ribbon) then go to the Solitary Island and fight Peepers. These enemies have very low Health Point counts and will quickly die. You can get all 256 battles in fastest this way. The second method is the one I prefer. You will need to do some esper gaining for your primary casters (or everyone, for those who are completionists) so why not knock out two obstacles at once? Equip the Cursed Shield and a Ribbon on one of your characters who will be learning spells. I ended up uncursing the shield before I finished learning the spellbook for all my casters. 256 battles is less than it sounds like, compared to learning the full spellbook. Speaking of esper gaining, you'll want to go to the Phoenix Cave or the Dinosaur Forest (if you're strong enough for the latter) located by Gau's Father's house for some good sources of both EXP and points toward leaning spells. If you want to learn spells but not gain EXP then go fight battles on the Veldt.

When the curse breaks the Cursed Shield becomes the Paladin Shield, the best shield in the game. The shield can teach you the Ultima spell at a "x1" modifier, so it would take the same amount of time as learning it from the Ragnarok esper would. With this you can have two people learning Ultima at once, one from the shield and one from the esper. There is only one Paladin Shield so, who gets to equip it? Give it to Celes for the best effect. When equipped with an Offering and a powerful sword she is the closest the game has to a Paladin, if taking her character development into effect also. Edgar and Terra are also great picks to give it to. If we're talking who might need the shield the most, that would be Relm or Strago. They are each on the low tier for defense stats.


HARD MODE NOTE:

Unavailable because you need Locke to get the Cursed Shield in the first place.
 
THE ECONOMIZER RELIC & THE DINOSAURS
My Party: Edgar, Terra, Sabin, Locke

edgar.gif
terra.gif
sabin.gif
locke.gif


Pick your best party, we're off to fight dinosaurs. The forest to the right of Gau's Father's house is known as the dinosaur forest. It is home to two types of dinosaur enemies and the stronger of the two, the Brachiosaur, might drop a valuable relic. The Economizer. This item makes you only use up 1 Magic Point to cast spells, including Strago's Lores if Strago has this relic equipped. You'll want at least 1 of these. The Brachiosaur also gives a ton of EXP Points and 10 points toward learning a spell, if you're esper gaining while doing this. Walk around in the forest until you run into a Brachiosaur. You may run into several Tyrannosaurs on the way before you encounter any Brachiosaurs. Despite the studies done on the real dinosaurs they resemble, the Tyrannosaurs are much less dangerous than the Brachiosaurs. They can cast Meteor and have a pretty strong Bite attack so watch out for them regardless. Make sure someone has a Ribbon Relic and someone else has a Peace Ring and a White Cape. This will keep these two party members safer from the Brachiosaur's Disaster ability. That is, unless you want a party full of Confused Imps with a Doom countdown, since that just might happen otherwise.


BATTLE: Brachiosaur
Image763.gif

This guy can use a Disaster attack that inflicts lots of bad status effects. You'll want to end the battle as soon as possible. Use your strongest melee abilities. Have a fighter attack while equipped with the Offering and Genji Glove. If you have Mog or Edgar then give one of them the Dragoon Boots with a Dragon Horn and Jump! Your casters can make you achieve a quick victory if you have one cast Vanish and then have the next cast Doom. Or if you want the challenge then just go with the melee attacking strategy. These guys are the most powerful enemies in the game when disregarding bosses. Another fun tactic if you do not want to rely on the Vanish + Doom Trick is to use the spell Quick if you have it since it gives you extra actions at the cost of many MP. Casting Quick on your Dragoon(s) or your fighter who has the Offering & Genji Glove Relics make these characters even more lethal. For a caster strategy have Terra, Relm, or Celes cast Quick then two consecutive Blizzaga spells to exploit the dinosaur's weakness. Strago should use Mighty Guard if he is with you. Have fun, and keep fighting until you win an Economizer Relic from one of the Brachiosaurs.


HARD MODE NOTE:

This doesn't change other than you now only have three people in the party to fight the dinosaurs with. The Economizer is even more useful in this challenge so it's worth trying to get. Be ready to do the Vanish + Doom Trick or cast Quick if the Brachiosaurs are too tough.
 
FANATICS TOWER - TREASURE HUNTING
My Party: Celes, Terra, Mog, Relm

celece.gif
terra.gif
mog.gif
realm.gif


Ok so for this part we are primarily just looking to grab treasure from the tower. You could attempt to climb to the top of the tower if you wish, but it is recommended that you refrain from doing so until you are fully ready with your best spells learned. Mog must be in the party equipped with his Moogle Charm if you want an easy climb, otherwise you will fight a seemingly endless army of magic-user enemies. You only have the magic command in this tower. Umaro will still be acting as a berserker and fighting the same way. Gogo can still Mimic. Anyone else must rely on their learned spells. So naturally, you want your best casters to come along for the quest. The three girls have the best base Magic stats, so I brought them and Mog. No random encounters for me while treasure hunting, no thanks. You may want Reflect Rings equipped on you and have taught your casters Ultima for getting through the random encounters if you are not using Mog's Moogle Charm to negate the random encounters. Life 2 and Life 3 will also prove very useful.

If you want to do the full climb, go ahead, but I am just grabbing treasure in the tower at this point. We'll be back later to go after the boss at the top.

Start climbing up the stairway. There is no way to go but up. Keep going up each flight of stairs. You will see doors on the right side of the flight of stairs occassionally so keep an eye out for those. The first of these doors has a chest with a Safety Bit Relic in it. Go to the wall one space to the right of the chest and face north and inspect the wall, there was a switch there. It opens a door one floor beneath you. Inside is a chest with Edgar's final tool, the Air Anchor. A few more steps up is a chest with a Genji Shield in it. Celes already had the Paladin Shield so I gave the Genji Shield to Terra. You may also want to give it to Shadow or Cyan, they fit it the most in-character. The next treasure room has a boss in it, which is one of the legendary dragons. Let's climb up a little further and we'll be back here on the way down. Go a little further up and you will see another treasure room. In here is a chest with a Force Armor. Now you're almost at the top of the tower but it is time to climb back down, unless you are FULLY prepared for the boss at the top. On the way back down let's go fight that dragon. Inside the dragon's room is a chest with Shadow's ultimate weapon in the SNES version, the Stunner Knife! Go battle the dragon next.


HARD MODE NOTE:

Unavailable due to Strago being here and in Hard Mode you cannot encounter Strago in the second world, regardless of if Relm is with you to re-recruit him or not. As in, NO, you CANNOT get the Gem Box. What, did you think it wouldn't be called a Hard Mode Challenge for a reason? Sorry! Embrace the difficulty of the challenge and let's move on.
 
BOSS BATTLE: White Dragon

Image1058.gif


The difficulty of this battle depends on your preparation. If you have multiple casters with a large selection of powerful spells available, and have access to Mute, then this is the easiest of the legendary dragons. If you have not been teaching your characters magic, then it could potentially be impossible to beat this guy. For the simplest method have someone cast Mute on the dragon. This leaves him helpless while you unleash Ultima and other powerful spells on him. He's programmed to keep casting Holy over and over again, failing each time, if he's inflicted with the Silence status. If you want more of a challenge, go in with casting your strongest spells (likely Ultima if you have it) while healing as needed. If you equipped your party with Reflect Rings then the Holy spells will get reflected back onto the dragon. He gets healed by this, but not nearly enough to negate Ultima or even Meteor. All he seems to ever do is cast Holy or Dispel. Seriously, this is the easiest dragon. Just make sure you've been teaching your characters magic. If you have no magic you're the helpless one, stuck with nothing but an Item command unless your name is Umaro.

Your prize for winning is a Pearl Lance, give it to Mog or Edgar. Now let's get out of this tower. You will need to climb all the way back down again, unless you're going after the boss at the top floor. We'll be back. For now return to the airship if you're following this walkthrough. It's almost time to go to Kefka's Tower.

 
KEFKA'S TOWER - PLANNING
My Party A: Edgar, Terra, Sabin, Locke
My Party B: Celes, Cyan, Shadow, Gau
My Party C: Mog, Setzer, Strago, Relm

If you feel up for it, we can begin clearing most of Kefka's Tower now. There's bosses to battle, items to be found, and a couple of Lores to unlock. This is NOT where it all ends, not just yet. We'll be back later to clear it all for good, but for now let's jump in and get some of what is available. Make sure everyone is properly equipped and on a decent level. Now, you won't have access to ALL the best stuff yet (which is part of what this treasure hunt is for) but here is a breakdown of what my parties look like, to help you prepare.


LOCKE
Valiant Knife
Atma Weapon
Dark Hood
Crystal Mail
Genji Glove
Thief Glove

TERRA
Falchion
Genji Shield
Oath Veil
Genji Armor
Earrings
Earrings
**** All spells known but Merton

EDGAR
Pearl Lance
Crystal Shield
Crystal Helm
Crystal Mail
Dragoon Boots
**** All Tools unlocked

SABIN
Tiger Fangs
Aegis Shield
Regal Crown
Red Jacket
Black Belt Relic
Sprint Shoes
**** All Blitzes learned

CELES
Scimitar
Paladin Shield
Oath Veil
Crystal Mail
Ribbon Relic
Gold Hairpin Relic
**** All spells but Merton learned

CYAN
Strato Katana
Crystal Shield
Diamond Helm
Crystal Mail
Black Belt Relic
True Knight Relic
**** All SwdTech learned

SHADOW
Stunner Knife
Mithril Shield
Dark Hood
Dark Gear
Memento Ring
Black Belt Relic
**** 99 Ninja Stars to Throw

GAU
Unarmed (he cannot equip any weapon but the Imp Halberd anyway)
Mithril Shield
Dark Hood
Snow Muffler
Cure Ring
Sprint Shoes
**** Stray Cat and the Rages he came with are learned

SETZER
Dice
Dice
Genji Helmet
Crystal Mail
Genji Glove
Coin Toss

MOG
Partisan Spear
Gold Shield
Dark Hood
Snow Muffler
Moogle Charm
Dragoon Boots
**** All dances learned

RELM
Gradeus Knife
Mithril Shield
Oath Veil
Behemoth Suit
Fake Mustache Relic
Safety Bit Relic
**** All spells learned but Merton

STRAGO
Magus Rod
Mithril Shield
Circlet Helmet
Behemoth Suit
Economizer Relic
Sprint Shoes
**** All Lores learned but Quasar, Force Field, and "Reflect????"

GOGO
SwordBreaker Knife
Mithril Shield
Dark Hood
Tao Robe
**** Commands are: Mimic, Magic, Lore, Blitz

UMARO
Bone Club (cannot be removed anyway)
Snow Muffler (cannot be removed anyway)
Blizzard Orb
Rage Ring


My characters levels at the time of writing this are between Cyan the lowest at 50 and Locke the highest at 75. I did leave out a couple of relics, you may have noticed. This is part of a strategy I will be using to clear Kefka's Tower. You switch parties just like in the Phoenix Cave to help with solving puzzles, only it is 3 parties instead of 2 this time. Here is the best part.... You can share items despite the party splitting into 3 groups. If Edgar had the Dragoon Boots and Dragon Horn but Mog is in a different party, you can remove these items from Edgar after you are going to switch parties, then give to Mog once you switch to his party. The same can be done for the Offering and Genji Glove combination as well as whoever is to be gaining extra EXP points with the EXP Egg. Share items. It will make this much easier. It's also a cool trivial thing to note, that your party's bag of holding somehow magically has the items that get unequipped from a party on the other side of the tower appearing in it. Anyway, let's jump into the tower. These are the three parties I used for this. I'll get more into party combinations when we are doing the final checklist before the final battle.

The party splits into three (I used the three teams I listed above) and each team jumps down into a different path in the tower, there are three and this is the storyline reason for why you must use 3 different teams. Here is an example of how you can do the Relic sharing. Each party had a designated person who would have the following:

Dragoon Boots + Dragon Horn
Edgar in Party A
Shadow in Party B
Mog in Party C

Offering + Genji Glove
Locke in Party A
Cyan in Party B
Setzer in Party C

Economizer
Terra in Party A
Celes in Party B
Relm or Strago in Party C (I gave it to Strago for boss battles, Relm otherwise)

EXP Egg
Give this to whoever is on the lowest level on each team, each time you switch teams.

You don't have to Relic share, it's just a suggestion and it might make this event easier.

I will refer to the parties as Edgar's party, Celes' party, and Setzer's party, to make it less confusing. Ready to get started?
 
KEFKA'S TOWER - PLANNING (HARD)
My Party A: Edgar
My Party B: Celes
My Party C: Setzer

By this point, in Hard Mode you're completely finished other than Kefka's Tower so this will be the final quest here. The preparation here looks a little different. You must clear each path using only one character per path so it will test every last ounce of skill that you have. Here is my breakdown before entering the tower....

EDGAR
Falchion
Crystal Shield
Crystal Helm
Red Jacket
Dragoon Boots
Dragon Horn

CELES
Scimitar
Crystal Shield
Oath Veil
Crystal Mail
Ribbon
Economizer

SETZER
Dice
Dice
Genji Helmet
Genji Armor
Genji Glove
Offering

All three were on level 79 as I write this.

All three know every spell that is available in this challenge:

Cure
Cure 2
Life
Antidote
Remedy/Esuna
Regen
Fire
Ice
Bolt
Poison
Drain
Fira
Blizzara
Thundara
Bio
Firaga
Blizzaga
Thundaga
Break
Doom
Flare
Demi
Meteor
Scan
Slow
Rasp
Mute
Safe
Sleep
Muddle
Haste
Stop
Berserk
Float
Imp
Reflect
Shell
Vanish
Haste 2
Slow 2
Osmose
Warp
Quick
Dispel

****Celes also knows Holy, from leveling up. It will not be available to Edgar or Setzer.
 
KEFKA'S TOWER - PARTY A
My Party: Edgar, Terra, Sabin, Locke

edgar.gif
terra.gif
sabin.gif
locke.gif


If you need to leave use the hook that flies between the three locations a party starts out at. This is your only way out if you need to leave the tower unless you know Warp!

Start off with Edgar's party. There are two conveyor belts, the left one moves you forward so take that one. The right one moves you toward the starting point. You will see a chest in the upper right corner with a Coronet. Relm can equip it but the Oath Veil is better. The thing that looks kinda like a magnet is actually a doorway that you can enter from the left of the Coronet chest. Go inside. More conveyor belts, take the left one this time as well, the right one moves you toward the door you just came in through. Go inside the door. In here you find an area resembling the Magitek Facility and the Vector Palace. Open the chest on the walkway to get Setzer's ultimate weapon, the Fixed Dice! Make sure to give him that.

You might encounter an enemy named Dark Force in these areas, let Strago be hit by two of the remaining Lores (Quasar and Reflect????) that this guy might use, he has nearly the entire Blue Magic spellbook to use against you. Someone needs to be under Reflect status in order for Dark Force to use the Reflect???? spell. Quasar he should use randomly at some point, all the rest other than Force Field you should have by now.

You'll be outside again. Head south and through another of those doors that look like magnets, to your right. You're stuck until one of the other parties presses the switch to the right of you, so let's swap over to Celes and her party (Party B). I gave Celes the Economizer here.


KEFKA'S TOWER - PARTY A (HARD)
My Party: Edgar

edgar.gif


This doesn't change much from the Normal Mode strategy other than you only have Edgar. Make sure he has the Dragoon Boots and Dragon Horn equipped! The Fixed Dice you pick up along this path is crucial for Setzer, so make sure you get that. Switch to Celes when you get to the part with the obstacle and the switch Celes has to step on.
 
KEFKA'S TOWER -PARTY B
My Party: Celes, Cyan, Shadow, Gau

celece.gif
cyan.gif
shadow.gif
gau.gif


Head down the stairs to the right of you and left through a magnet door. That's what they look like so that's what I'm calling them. Follow the path in this room north of you to get to a chest with a Minerva Buster for Celes. Terra can also equip it but I gave it to Celes, due to Terra's Morph command Celes will benefit more from equipment upgrades. Follow the path and go through the northernmost of the two doors in the left corner. Up the stairs is a Tack Star for Shadow to Throw in battle. There is a magnet door to your left but you cannot reach it, as it is higher up from the ground where you are. Head south. Now you are in what looks like the jail from the Vector Palace. In Kefka's old cell you will see your first boss in the tower, Atma! His name changed to Ultima Buster in later versions. I like his original name of Atma better so he's Atma to me.


KEFKA'S TOWER - PARTY B (HARD)
My Party: Celes

celece.gif


This does not change much from the Normal strategy, other than you only have Celes. Make sure to give the Minerva Buster to Celes! She is the only one of the three in this challenge who can equip it and it will benefit her greatly. You do not have to fight Atma unless you want to. Why not? Let's go!
 
BOSS BATTLE: Atma

Image747.gif


He looks like Atma Weapon and acts a lot like him too. Atma uses powerful magic such as Meteor, Firaga, Thundaga, and Blizzaga. After losing half of his Health Points he begins using stronger abilities like Flare Star. If you attack 12 times and the boss survives, he glows. After 3 turns he will then use Ultima! In order to survive you will want to show no mercy here. Have your caster (Celes for me) healing every round while your fighters use their best abilities. For me it was Cyan, Gau, and Shadow. So I had Quadra Slice, Stray Cat Rage, and Ninja Stars as my main attacks respectively. The boss vanishes revealing a save point when you win! Might want to save.


HARD MODE:

You only have one character so it's tough. You definitely don't want him to reach the point where he casts Ultima so a good strategy would be to cast Quick. You can either give Celes the Offering and Genji Glove by taking them from Setzer before this fight starts, or have her cast two consecutive spells. Atma does not absorb any of the three main elements so Firaga, Blizzaga, and Thundaga will all work great here. If he hurts you then cast Quick, then heal on one of your extra turns and attack on the other. He's possible to defeat without Quick, but that spell makes it a whole lot simpler. Thanks to the Minerva Buster you should mostly be fine, Celes dodged constant Thundagas only to turn around and cast Blizzaga on the boss. This repeated for a few turns, then he tried Flare Star which she also dodged and then I cast Firaga to win the battle.

 
KEFKA'S TOWER - PARTY B - CONTINUED
My Party: Celes, Cyan, Shadow, Gau

celece.gif
cyan.gif
shadow.gif
gau.gif


Save if you need to at the new save point that showed up after defeating Atma. You might encounter a Retainer in this area. Make sure to defeat at least one enemy party that has one, so Gau can eventually learn its Rage. Retainer is a highly popular Rage because as I explained a while back, it allows Gau (or Gogo) to use Leo's Shock ability. Proceed south and you will fall into a room that looks like the Magitek Facility. Go up the stairs and enter the door. There's pipes in here. The right pipe takes you to the magnet door above the Tack Star chest from earlier, so take the left pipe. You're outside again. Open the chest to your left to find a Force Shield. There's a conveyor belt to your right that goes down to a pair of doors, go left first and open the chest to get a Force Armor. Do not take the left conveyor belt, it takes you back where you came. Go to the right and in through the magnet door facing left.

Hey look, it's Edgar's party! Hi, Edgar's party! They're still stuck until you help them out by stepping on the switch. Ok go open the chest to your right to get a Ribbon. If Celes already has one, give this new one to Terra. Step on the switch to open the path for Edgar's team. You're not done with this team yet though so go back outside and through the door on your right. Follow the path and you will see a red floored stairway, and up at the top of this stairway is.... a dragon! Boss time!


KEFKA'S TOWER - PARTY B - CONTINUED (HARD)
My Party: Celes

celece.gif


Same strategy here, really. If you do not feel confident about the random encounters then just run. Retainers are dangerous here and aren't worth it against Celes by herself. Give her the Ribbon when you find it if she does not already have one equipped. Now she is immune to nearly every negative status effect! You do not have to fight the Gold Dragon since you cannot get the Crusader esper, but.... Why not? He's easy anyway.
 
BOSS BATTLE: Gold Dragon

Image842.gif


Looks more like a dinosaur than a dragon, but whatever. He's pretty easy. The Gold Dragon uses nothing but thunder elemental attacks and he is weak against Water. If you had Strago with you then Aqua Rake and Clean Sweep would be effective. The new spell Flood is excellent in this battle if you're playing on the GBA or PC versions. If you're on the SNES, well, it's still not too tough. I had Celes equipped with the Minerva Buster so she absorbed the thunder spells and was able to keep healing the fighters. Cyan used Quadra Slice, Shadow Threw Ninja Stars, and Gau used the Stray Cat Rage. Follow a similar plan. Equip a caster with either the Minerva Buster or the Paladin Shield (if your caster is male) then have them heal as your fighters attack. Arguably the second easiest dragon after the White Dragon. Perhaps the developers should have had this guy trade places with the Storm Dragon, huh?


HARD MODE:

Really easy as long as you have the Minerva Buster equipped. Celes will dodge every single Thundara that the dragon uses. Cast Flare a few times and then you will win.


One more dragon to go after this one! You will get a Crystal Orb for winning. You can keep proceeding down the path in the next room. Now it's time to switch to Setzer's party.
 
KEFKA'S TOWER - PARTY C
My Party: Mog, Setzer, Relm, Strago

mog.gif
setzer.gif
strago.gif
realm.gif


I gave Strago the Economizer and Mog the Moogle Charm. Start by going onto the conveyor belt south of you on the left side. There is a chest by a nearby door with a Red Cap. Go through the door by that chest and follow the path. There's two chests, open them to get a Nutkin Suit and a Gauntlet. Give the Nutkin Suit to Strago or Relm unless both have a Behemoth Suit. The Gauntlet is not needed by anyone at this point really. Now go back the way you came and enter the door south of you, go left into a magnet door. You're in a Magitek Facility type room. Open the chest north of you to get a Hero Ring. Ride north out of the room on the conveyor belt. Do not go through the pipe south of you, it makes you fall back down to the previous room. Save if you need to, there is a boss battle if you try to proceed to the left.


KEFKA'S TOWER - PARTY C
My Party: Setzer

setzer.gif


Unlike the Normal strategy, you won't have a Moogle Charm. Setzer's all by himself so give him the Fixed Dice and Dice while equipped with the Offering and Genji Glove. If he is at a high enough level with enough GP/Gil to spare, you could also consider GP Rain. You won't need to give the Red Cap, Nutkin Suit, Hero Ring, or Gauntlet along the path to anyone.
 

Users who are viewing this thread

Members online

No members online now.

Forum statistics

Threads
174,826
Messages
3,300,732
Members
21,726
Latest member
chrisxenforo
Back
Top